Learning Lessons with Mrs. Labrasciano Home Shop Instagram Pinterest Email Image Map

All About Dinosaurs In The Classroom


If you want to have the happiest students ever, teach them all about dinosaurs! They absolutely love it.  When I first started teaching I was very much by the books and did exactly what the district told me to do.  As I became better at my craft I realized that I could teach the standards that the district wanted more thoroughly with engaged students if I used topics that the students wanted. The big bonus is that student behavior is much better when they love what they are learning.  Every year I give an interest survey and every year dinosaurs are on the top for students. In this post I will walk you through a week of learning about dinosaurs.


The very first part of every lesson for me is the engagement piece.  I want to hook the students in so that they are invested in what they learn.  For Dinosaur week I created a control panel and taped it outside of our classroom.  As students walk in I had them press their lunch number in, scan their finger and get their security badge.  They were so excited and this was very little effort for me.


The first lesson's objective was to learn how figure out unknown vocabulary that the students would encounter through independent reading.  We read a dinosaur passage together whole group and circled unknown words.  We walked through the word "fossil" together on a 4-square vocabulary organizer which you can see below.  Before we filled the organizer out, I gave the students salt dough and had them make a fossil.  This hands-on activity allowed them to see first hand what the vocabulary word was.  This helped the students to master the skill of learning unknown words.  Now they're ready to tackle those words on their own.  If you click on the photo above it will take you to another post where you'll learn how to make this salt dough.  As a side note, it takes at least a week to dry the fossils so starting on day one helps.


 On day two we moved into reading about dinosaurs with partners.  Each group was assigned a station with books.  The partner's had to find an unknown word and fill out a 4-square.  At the end of the lesson the partners shared their 4-squares with the class.


Days 3-5 were spent studying different dinosaurs independently.  Each person received a leveled passage about a specific dinosaur, a 4-square and dinosaur writing paper.  The first day they figured out any unknown words and shared them with the class.  Then they moved on to finding important details and writing about their dinosaur in an informational piece.  At the end of the week they shared their writing with the class.  Through this week's lessons they were able to learn a variety of informational standards which included:  main topic, vocabulary, key details and informational writing.  It was a fabulous week.


If you are too busy to create all of the materials including differentiated reading passages that your students need, click below to find my Dinosaur Unit.  Included are 6 different passages on:  dinosaurs, paleontologists, T-Rex, Stegosaurus, Velociraptor, Triceratops and a ton of other resources!!


You may also like partner pairing cards.  These cards get your students up, moving and thinking about the days lessons before they start!


Reading Notebooks Made Easy


Set up reading notebooks with your students in a proactive way that frees up time in each of your lessons! Reading notebooks are great way to store tools and information for students that they can reference throughout the year. Reading notebooks also allow teachers to have a concrete example of student work that proves mastery of standards. If you choose to put mini anchors in your reading notebooks then you can free up wall space in the classroom and create a calm environment for your students.  Click on the picture above for a free how-to video on setting up reading notebooks.

Fidget Ball DIY


Do you have students who need a way to get out their fidgets, anxiety or extra energy while they're learning? A fidget ball may be just what they need.  Read below to see how you can make them yourself.

Supplies:  balloons, sand, funnel, pen, scissors

1.  Blow up balloons to stretch them out.
2.  Place the stem of the balloon over the stem of the funnel.
3.  Fill the balloon with a hand-full of sand.  Use the pen to push the sand down if needed.
4. Tie the balloon and place another balloon over it with the stem facing the opposite way.  
5. Cut the stem off.
6.  Repeat steps 4 and 5.
7.  Keep extra balloons on hand in case they become pierced.

Make sure to follow all of the directions on the packages with safe balloon use.  Below you will find some rules that will help keep you sane.

1.  Students should leave the ball on a surface at all times.
2.  Students should not pinch or poke the ball.
3.  Students can roll the ball on their desk with their palm as long as they pay attention to their task.
4.  Students can press the ball.
5.  If students mistreat the ball it should be taken from them.

Hatching Chickens in a Classroom


Are you interested in hatching chickens with your class? If so I can promise they will be the happiest students who forever remember the experience.  I can also promise you that it will be the grossest lesson you have every taught your students, but well worth it.

Supplies that you will need:  fertilized eggs, incubator, brooding box (you can use a large cooler), heat lamp, thermometer, paper towels, rubber gloves, safe cleaning solution,  chicken feed and waterer.

You might want to work with a local farmer to get the supplies you need.  At the very least, you will need someone to return the chicks to once they are hatched.

We found the book below at out local library.  It has all of the information that you will need to hatch chicks.


Follow the directions with your incubator to keep the right humidity and temperature for your eggs. Both are very important for the duration of the incubation cycle.  Remember to not open the incubator unless you need to add water for humidity.  You will be able to keep the incubator at school for most of the hatching cycle (if you're allowed).  If you see a pip in the shell like seen below, you will have on average 24-48 hours before hatching.  You don't want to unnecessarily move the eggs close to hatching, but you don't want a chick to hatch and be left in the incubator for more than 24 hours. You'll have to make the best judgment for your class.


Once the chick hatches it can be left in the incubator for up to 24 hours.  I removed my chicks once they were almost dry.


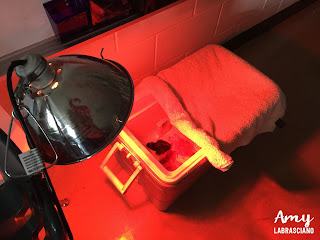
Once the chicks are dry you will place them in a brood box with a heat lamp.  You won't want to place them with older chicks that could peck them.  The brood box should start at 95 degrees and be reduced 5 degrees each week until they are 20 days.  It's important that the box is large enough so that chicks can be under the lamp when they want and cooler on the other side when needed.  You need to keep the room quiet and not handle the chicks for the first 24 hours or so.  If you have to hatch the chicks at your home rather than school because of timing, let the chicks stay at your home for a couple of days.  They don't do well with transportation after hatching.


Chicks can eat and drink right after hatching.  Keep food and water in the brood box.  Once they start eating the box will get dirty often.  You'll have to pull the paper towels out of the box and wipe it down several times a day.  Students love to do this.  Make sure they wear gloves and the cleaning solution is safe for both the children and box.  You'll need to bring the chicks home each night because it is not safe to leave a heat lamp unattended.

I kept the chicks at school for one week before I returned them to their farm.  It's a lot of work and that's all our schedule and my patience could handle.


 Here's our happy little chicks!

If you would like to read about our chicken lessons and find materials to teach your students with, click on the picture below for another blog post.


Teaching About Chickens In The Classroom


Students love learning about animals in the classroom.  Teachers love teaching about animals because it's engaging for the students, they pay attention and they can tie a lot of subjects together very easily. Teaching about chickens can allow you to easily cover every informational reading standard, life cycles, habitats, basic needs and similarities between adult and new chicken.


Chicks and Chickens by Gail Gibbons is a great book about all things chickens.  It has a ton of information that's relatable and easy for students to understand.  You could very easily teach all informational standards with this book.


Students can read about the chicken lifecycle to cover part of your lifecycle science standard.  You can use the reading to introduce students to new vocabulary lessons, key details, informational text features, retelling and informational writing.  Consider having the students write the lifecycle to explain how steps connect to one another.

Have students identify the main topic of paragraphs by splitting the book up amongst students groups.  They can construct posters with the information and share it with each other to cover listening and speaking standards.

If you've read about other birds in class, have students use the key details from both texts to compare and contrast the two.


Once students have read about chickens you can check their vocabulary knowledge by building a chicken flip chute.  On one side of a card you place the vocabulary word.  On the other side of the card you place the definition.  Students work with a partner to recall vocabulary.  Flip chutes are simple to make and the students have a great time with them.  If you aren't familiar with them you can watch a video on how to make them here.

If you would like to up the engagement even more and hatch chickens in your classroom, scroll all the way to the bottom for a link.


If you are too busy to pull together and create everything that you need for an amazing unit for your students, click below for the Chicken unit that I've created.


Vinyl Cutting Machines For the Classroom


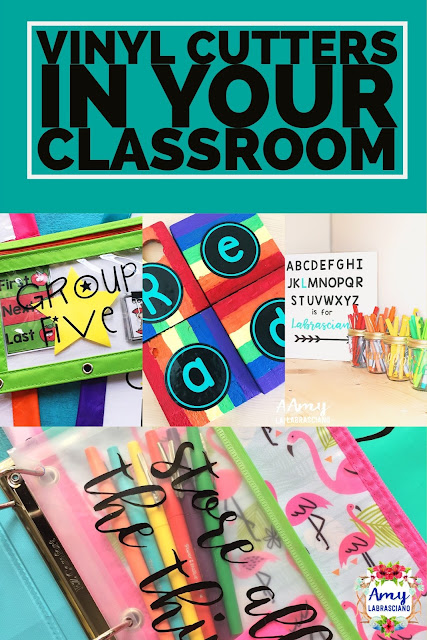
Click here to learn about using vinyl cutters such as Cricut and Silhouette in your classroom.  The information can be used in preschool, grade school, middle school and highschool.  You'll learn what vinyl and tools will be helpful for your machine.

Recently I decided to take the plunge into the vinyl cutting world.  The first choice I had to make was between a Cricut and Silhouette.  It's important for me to tell you that I am not an affiliate of Cricut or Silhouette.  No one sent me free materials to try out.  We had to make the decision based on our family dynamics and our budget.  I have used the Silhouette with a couple of friends and owned the old original Cricut that took only cartridges myself.  To be honest, I think you would be happy with either if you are crafty and somewhat technologically inclined.  I have a ton of friends who LOVE their Silhouette machines and a couple who gave up on it because they couldn't figure it out.  Ultimately I decided on the Cricut because my friend who is the queen of Silhouette told me she thought my kids would find the Cricut more user friendly.  She was right, it is very easy to use and the new Design Space on Cricut is amazingly simple and creates wonderful projects (even with young users)!! Once I had the Cricut I found that it does two things that Silhouette doesn't.  The Cricut can cut chipboard and engrave metal.  I love that I can whip up a dog or cat tag for our furry family members.  If I were choosing again, I would go with the best deal that I could find because I think you would be happy either way.  My family purchased the 2nd Cricut which is the Cricut Explore one.  This model was quite affordable and my only complaint with the machine would be that it is a bit slower than the newer models.  This hasn't really affected me, but it's good information to have if you aren't a patient person.  My largest complaint with Cricut comes from their customer service.  When we ordered our machine we intended to get the Cricut Explore Air. It is wireless and quicker than the One.  Both the One and Air were on sale for a great price.  For some reason, either my error or Cricuts we ended up with the One being delivered.  I spoke to customer service several times and had two issues:  throughout the process they didn't understand me (language barriers) and told me I would have to pay for shipping going back and forth again.  In the age of hassle free returns this was SUPER annoying!!!!!! My recommendation would be to purchase the machine from Amazon or another site that offers great customer service and hassle free returns.  (I'm not an Amazon affiliate either.)

My ultimate piece of advice if you want to get a vinyl cutter is to think about how much money they could save you on gifts.  We agreed as a family to give gifts made by the Cricut for the first year.  In the very first month we saved more on gifts than we spent on the machine.

The second most asked question that I get on social media is what supplies do you need.  It depends on what you want to do with it. Here are some things I have learned: 

1.  Look at the vinyl description to choose what grade you need.  There are three different grades of vinyl:  heat transfer, permanent and removable.  Heat transfer can be used on cloth material, outdoor items or creations that you want to be dishwasher safe.  This is the most expensive vinyl.  Permanent vinyl can be used outside for up to 5 years (depending on maker) and hand-washed.  Removable  can be easily removed from items like phone cases or things that won't be used a lot and also is used for stencils.  I bought variety packs of each grade off of Amazon to get started.  They offer a great variety and are easy to move in and out of the machine as compared to rolls when you are getting started.  You can see these packs on my Instagram account. Once you have the hang of it, rolls are much cheaper on EBay.  I buy the huge commercial rolls and it makes each project very cost effective.  I can't give you a specific one because they constantly change.

2.  You will also need transfer tape.  Again I buy a huge roll on Ebay.  You can see me using one here on Instagram.

3.  You will need a weeder and scraper.  I bought a Cricut tool kit.  You can also buy a dental picker and baking scraper.  You can see me using a scraper here.

4.  Choose a chunky font for cutting and weeding.  You can search "good fonts for Cricut" and a large list will come up. The chunkier and straighter the font, the easier the project will be.  I have listed the fonts I remember under each picture.

5.  Fonts and designs are all free for personal use.  You may not recreate any of my designs or anyone else's designs to sell or without paying for a font.  Even though I don't sell my designs,  they are all copyrighted on the day I publish them.  I want teachers to enjoy making them and using them personally free of charge.  Please contact me by email for commercial use.

Some more advice that  I would give is to be patient with yourself.  Practice on scrap wood or items that you wont' be upset at the outcome.  Do not try cups first like I did.  Curved surfaces are a bit trickier.  I'm going to give you several examples of my projects below.  I've had the machine less than three months so I'm still a new user too.  Be kind with your comments please:)


Font:  DJB Polky Dots

Font for Labrasciano:  Jenthill
Font for alphabet:  default font on Cricut
Font for jars:  KG Manhattan Script


Label storage boxes for workstations.

Font:Janda Silly Monkey


Font: KG Manhattan Script

Font:  Jenthill

Font:  Jenthill


Font:  Jenthill

Font:  Jenthill


Font:  Janda Silly Monkey


Below you will find more projects that I've made with my Cricut either for my house, gifts or classroom.  Follow me on Instagram for new projects that I make and all things education.

Font:  Jenthill

Font:  KG Red Hands

This font is not good for a cutter.  Take my word on it.

Monograms created on Monogram App and imported


Font: Starfish


Font:  Athletic


Font:  Starfish

Font:  Bakery